Latest from MrBead with Free
Shipping + Beading for Beginners
To go to the MrBead store
click here. Or our UK pound Bead
Shop at MrBead.co.uk
If you weren't mailed this offer enter your e-mail address
here to receive next month's newsletter.
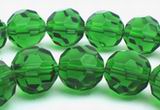
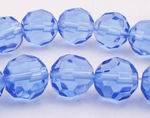
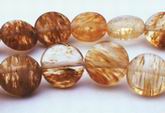
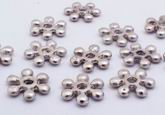
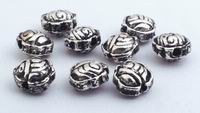
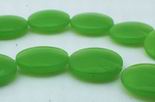
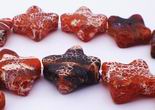
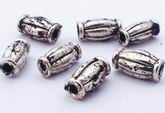
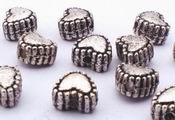
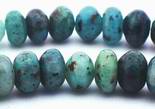
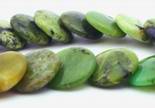
Click a picture below to see one of this month's new beads. To receive free shipping enter "freeshipjune" (without the commas) in the box at checkout, and click "Redeem Coupon". Use NOW - as expires Thursday 26th June 08. Only for use at MrBead.com or MrBead.co.uk and cannot be used with any other discount or eBay.
To see all What's New in the US store click
here - in the UK shop
here
To view all are old newsletters click
here To go to our MrBead
store click here or
MrBead.co.uk
Beading for Beginners
Perhaps you are a crafter in another medium but find yourself inexplicably attracted to beads and want to start beading. Maybe you've never held a needle before but want to get started now. Keep reading for all the tips and ideas to get you rolling, just like a beading pro!
Difficulty:
Easy
Time Required:
a few hours
What You Need:
�
A beadwork pattern in the stitch of choice.
� Beads for the design in the colors called for and in the size required.
� Beading needles in the proper size for the beads.
� Thread and thread conditioner of choice.
� Workspace and good lighting. Natural light is a great choice.
� Keep some scissors handy.
Here's How:
You might want to print a basic tutorial on
the stitch you're using
1. Decide which size/type of bead you'd like to work with � larger beads are easier. Remember - the larger the bead size number, the smaller the bead! Try not to start with anything smaller than an 11/0, in order to avoid frustration.
2. Choose a needle to work with. Some beaders swear by Pony Brand needles, other prefer John James brand. I like all of these types, as well as some various "plain wrap" beading needles. Steer clear of the "collapsible eye" twisted wire needles - they are difficult to work with. Remember that beading needle sizes roughly correlate to bead sizes - a Size 10 or 11 needle will work well with 11/0 beads.
3. Choose a thread to work with. Avoid sewing thread, dental floss, monofilament thread and embroidery thread (even silk) as these fibers are not made for beading and have a tendency to break, fray and eventually rot.
4. Decide on a stitch to learn. Almost every beader I know has begun with either Brick Stitch or Peyote Stitch. Flat, even count Peyote may be the most used stitch there is. There are many patterns available in this stitch.
5. Pick a pattern. For a very first project, stick to something simple and fast - getting a project completed is a great way to give yourself some positive reinforcement! Keep color choices simple and fairly far apart on the color wheel - that makes it easier to complete the pattern.
6. Get the beads you'll need for this project. Many patterns come with a color legend that will tell you which bead color numbers you'll need. If your pattern doesn't come with a legend, then just choose colors as close to the pattern as you can. Or make your own color choices.
7. Arrange your workspace. A piece of Vellux blanket is an excellent beading surface. Pour your beads into small, manageable piles on the Vellux and place your pattern in an easy to access spot. Make sure you have good lighting.
8. Thread your needle and prepare it with beeswax if you like to work with prepared thread. I do, and give my thread a light coat of wax before I begin a project.
9. Begin your project with a basic "stop" bead at the end of your thread. Place a bead on the thread and then loop back through it to secure the end of the thread and help keep your beads from falling off.
10. Begin working your pattern. That's all there is to it!
Tips:
1. Make sure you have enough beads and thread of the same color to complete the project. Nothing is worse than running out of a bead color halfway through!
2. Work with a comfortable thread length and wax your thread lightly to keep it from tangling.
3. Lighting may be a beaders best friend, especially if that beader is "of a certain age".
4. Keep a couple of spare needles around, just in case.
5. Make sure your pattern is readable. I like to make a copy of mine and keep it in a page protector, That way, if I want to mark my rows as I go, my original pattern is still in good condition.
To see all What's New in the US store click
here - in the UK shop
here
To view all are old newsletters click
here To go to our MrBead
store click here or
MrBead.co.uk